Development Environments: JavaScript Programming Setup
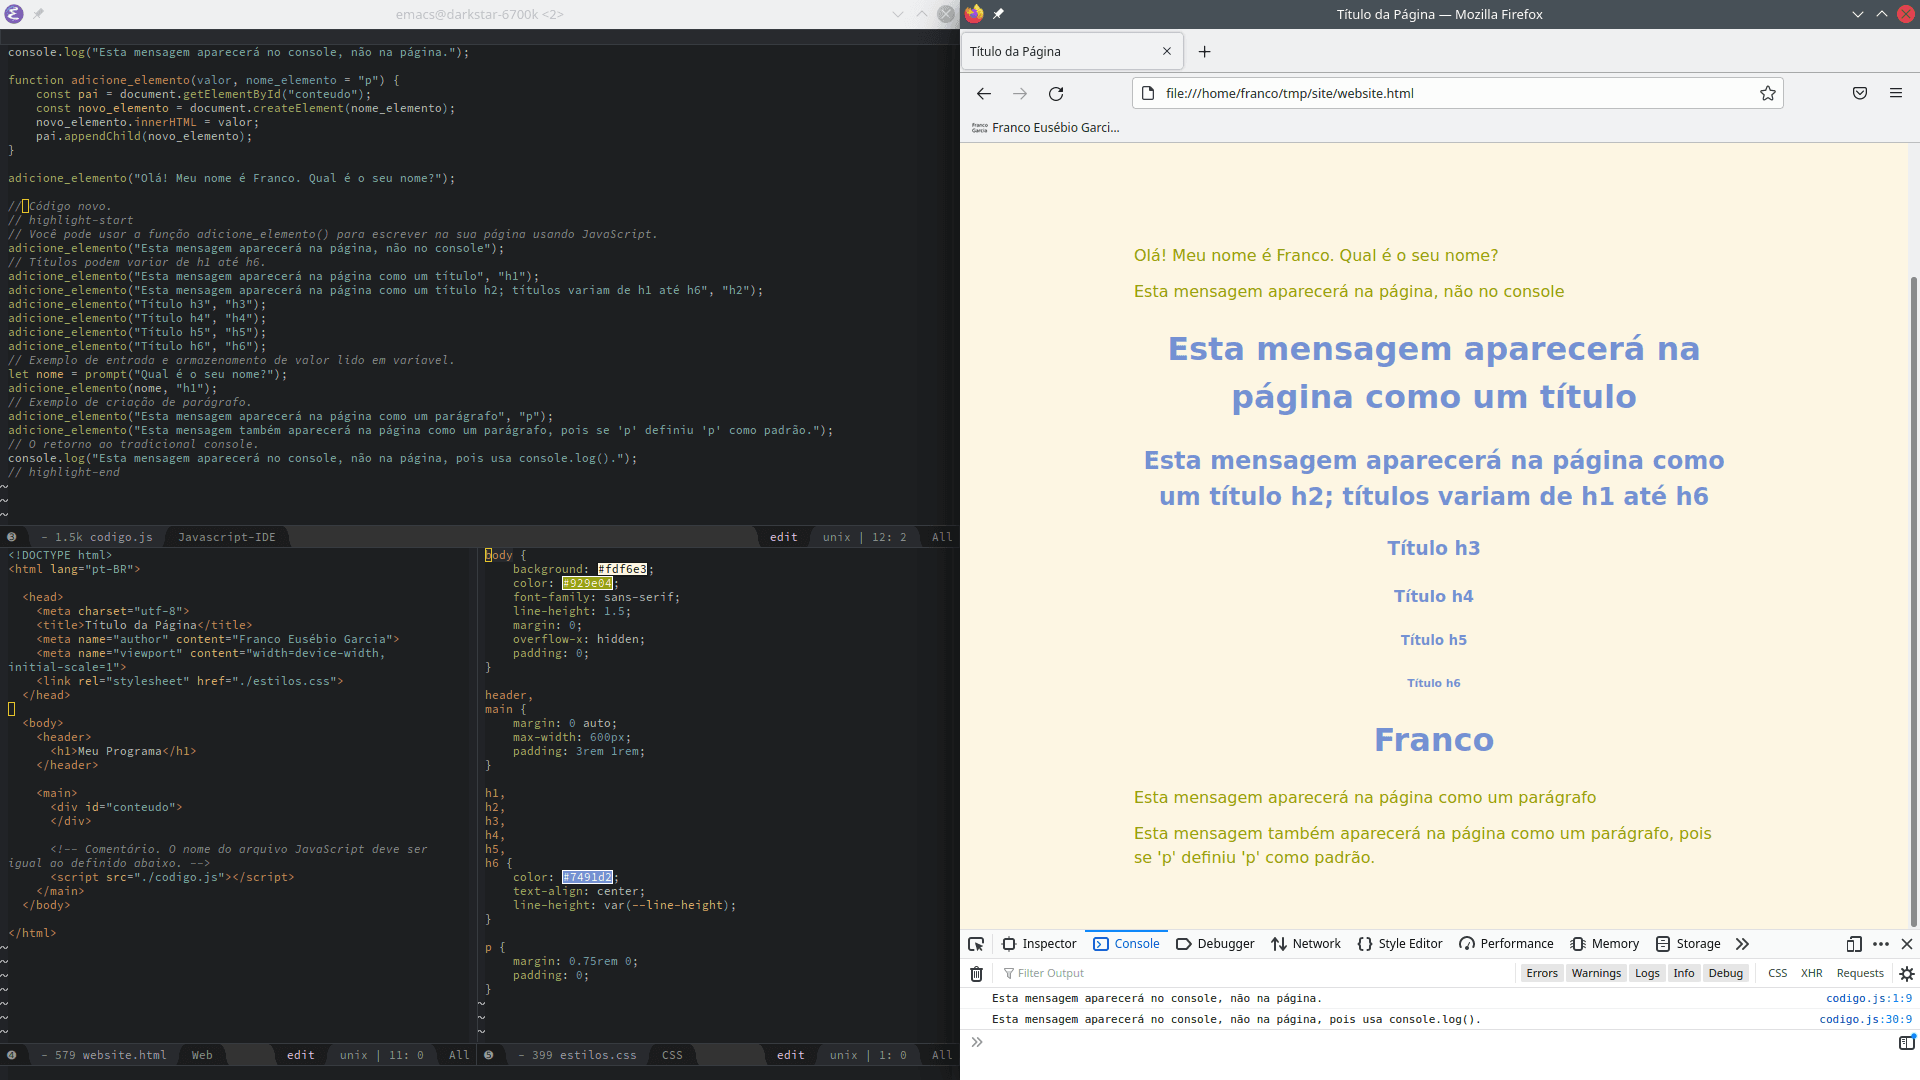
Image credits: Image created by the author using the program Spectacle.
Requirements
Do you have a programming text editor? Great.
If you do not, you are going to need one. If you are new to informatics in general or if you just want a shortcut to start faster, check out the entry on how to install programs.
Alternatively, you can use this online environment to program in JavaScript using your browser. The environment is useful to start activities quickly; nevertheless, sooner or later, you will need to set up an environment and learn how to set up an environment and use applications such as Integrated Development Environments (IDEs).
Video Version
This entry has a video version available on the YouTube channel. Although this text version is more complete, you can follow the video first, if you prefer it.
JavaScript Inside of the Browsers
The embedded interpreter available to use on computer browsers contribute to make JavaScript one of the simplest languages to start programming activities. As mentioned in the introduction about development environments, you can start by simply opening the available developer tools and writing the source code on the interpreter mediated by the console.
If you still do not have one, the first step is choosing and installing one (or more) modern Web browser(s), such as:
- Mozilla Firefox;
- Google Chrome (or Chromium, if you prefer a browser without preinstalled Google services);
- Microsoft Edge (Edge, not Microsoft Explorer);
- Apple Safari;
- Opera.
Web developers often install multiple browsers to test their websites and systems. This is important because, unfortunately, there are differences among Web browsers that may result in some implementations only work in some browsers, not all. Put simply, there are three main browser engines, with which one can create Internet browsers:
There are other engines (such KHTML) and many other browsers. However, many of those other browsers use one of the previous three engines.
It is not necessary to install all browsers when you are starting programming activities. A good starting point is installing your favorite web browser, or install one browser using each of the main engines.
Internet Accessibility
However, there is an exception. Accessibility is important and it is not everyone that use the Internet graphically. Thus, it is worth to know textual web browsers, such as:
People with visual disabilities, including bling people, also use the Internet. However, they can only access all content if the page was designed for this. If you want to create more accessible web pages and systems for more people, refer to references such as the Web Content Accessibility Guidelines (WCAG) 2.1.
JavaScript Outside of the Browsers
The browser interpreter is more practical and convenient when you are starting, for it does not require installing and configuring the interpreters. However, if you do not want to use a browser interpreter, another possibility is to install a command line JavaScript interpreter. Two popular options are:
Two advantages of using SpiderMonkey or Node.js are the possibility of automating source code execution and testing.
In particular, there are package managers (such as npm) that make it easier to get programming libraries for JavaScript.
Furthermore, external interpreters enable using JavaScript for applications that are not designed for the Internet. Web programming is often divided in two fronts:
- Front-end, which is the part with which end-users interact. The front-end is the visible and audible part of a website. Besides JavaScript, HyperText Markup Language (HTML) and Cascading Style Sheets (CSS) are common languages used for front-end programming. After its conception, JavaScript quickly became a front-end programming language (although that term was not used back then) after its inclusion in the extinct Netscape Navigator web browser.
- Back-end, which is the part with which end-users do not interact (at least directly), though it makes complex Web systems work. Technically, you can write back-end code in any programming language. Common options include PHP, Java, C#, Ruby, Python, Go, C, C++ and... JavaScript.
The merits of JavaScript as a back-end language for professional use are arguable. Nevertheless, it is used and the high investments resulted into improvements for the language as a whole, principally supporting tools. Projects such as Babel and Unified are two examples.
In practice, the results are positive for beginners. The possibility of using the language outside browsers, the proliferation of dynamic and complex Web systems, and of programming languages can aid the transition from beginners to intermediate and expert levels.
Besides, beginners often want to view their results outside a terminal. It is much simpler to create multimedia content (for instance, with graphics, sounds and video) using JavaScript for the Web than in many other programming languages. This is trivially simple using with HTML, CSS and JavaScript when compared to other traditional languages.
For programming as a career, JavaScript as a language for either front-end, back-end or both (a combination called full-stack) is a valid option with good employability. The demand for Web programmers is high and it should continue to grow with the digitization of business and other activities.
First Steps to Begin Programming in JavaScript
There are two quick ways to start programming in JavaScript.
- As it was previously mentioned in the introduction about development environments, you can, simply, open the web developers tools in a computer and write the source code in the interpreted mediated by the console;
- You can create two text files (an HTML and a JavaScript file) and open the HTML file in a web browser. Optionally, you can create a third file with CSS style definitions to customize the appearance of your page.
First Steps with the Embedded Console
In many computer browsers, you can press F12 to start the embedded console.
You can start right now:
Press
F12;Search for the tab named
Console,Terminal,Interpreteror something along these terms in the newly displayed panel;Type some code. For instance:
console.log("Olá! Meu nome é Franco. Sou um programador.")This message means "Hello! My name is Franco. I am a programmer." in Portuguese (the images follow the Portuguese version of this blog's entry). The documentation for
console.log()is available on MDN. From the documentation, one can learn thatconsole.log()displays a message in the terminal.Press
enterto send the code to the interpreter;Wait for the response.
The result will be:
Olá! Meu nome é Franco. Sou um programador.Think on how to proceed;
Write a new line of code and repeat (2) until you fulfill your goal.
If you try to copy and paste the previous code, you may see a warning message; you can learn what it means and how to proceed on this link.
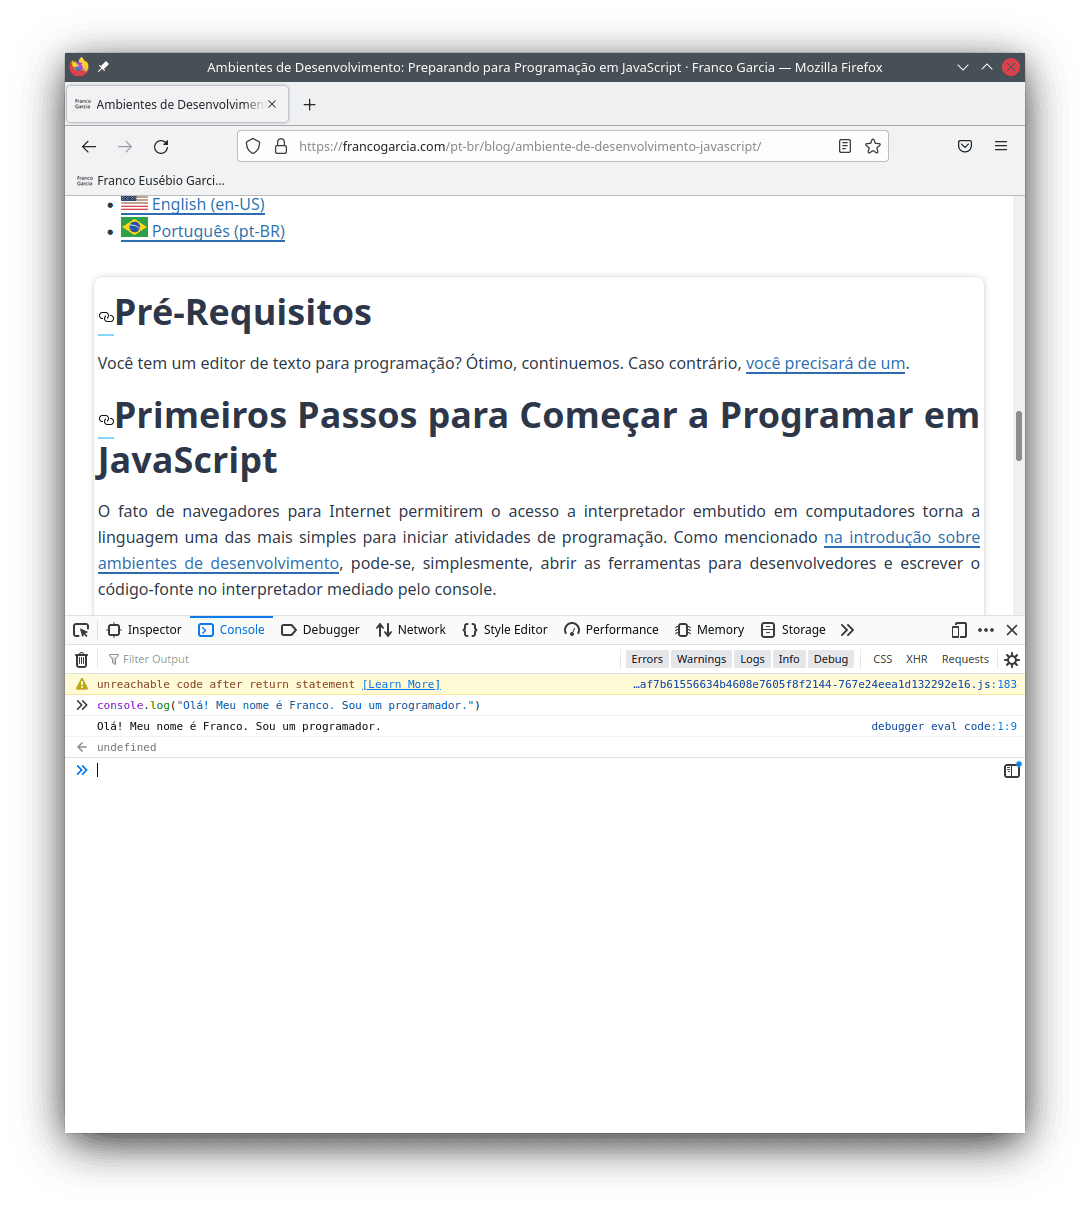
The console uses the browser interpreter, which means that it is as capable as the chosen browser itself. It is practical and an example of Read, Evaluate, Print, Loop (REPL). Basically, you will write commands, execute them, wait for the interpreter, which will evaluate them and write the results in the console, and repeat the entire process while you are programming.
Getting to Know JavaScript Through Experimentation
Continuous practice is fundamental in programming. The following code blocks illustrate some resources of the JavaScript language (and which are also available in many other programming languages).
At this time, you should not worry if you do not completely understand what they do.
You should just experiment.
You can write the code blocks in the interpreter provided by the console (reopen it with F12, if necessary), run the code (press enter) e check the results.
You can change values to observe new results if you wish.
If the change results into an error, compare with the original code and note the differences.
Furthermore, many items provided the related MDN documentation entry. If you want to know how a resource works, you can refer to the documentation. You should remember, though, that the intention is to show that you do not have to memorize words and expressions to program. Rather, you can consult them whenever you need. Thus, the intention is not to scare you with more material or to show everything that you should know. On the contrary; understanding will come with time and practice.
Experiment, watch the results, make changes. You can start learning in a playful and interactive way.
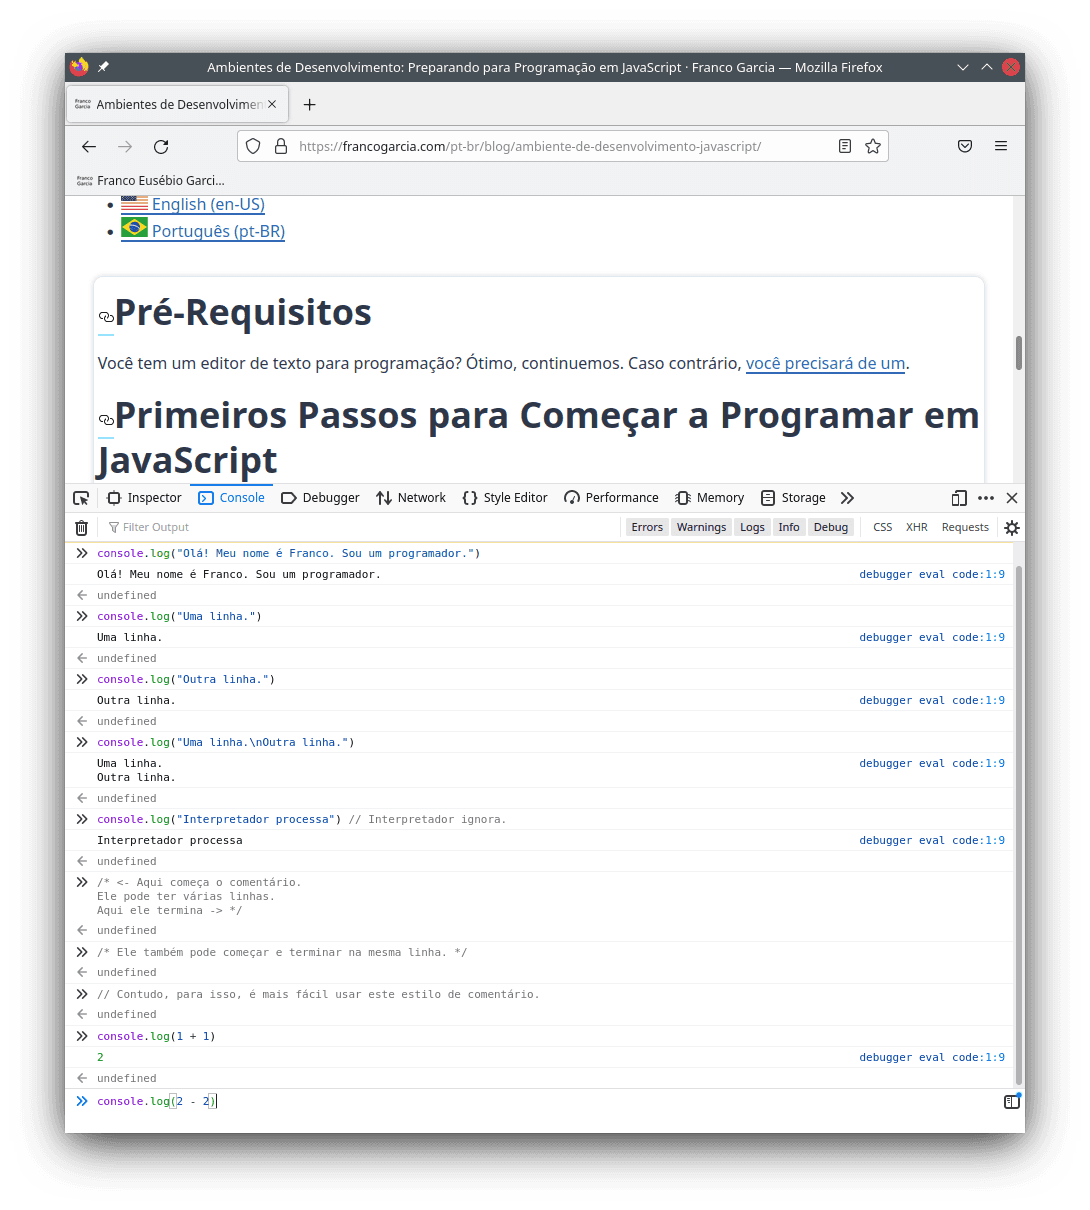
Text writing:
console.log("One line.")
console.log("Another line.")
console.log("One line.\nAnother line.")
Comments (text that is ignored by the interpreter; MDN):
console.log("Interpreter processes") // Interpreter ignores./* <- Here the comment starts. It can spawn multiple lines. Here it ends -> *//* It can also start and end in the same line. */// Though, for single line comments, it is easier to use this comment style.Mathematics operations:
Sum, subtraction, multiplication and division (MDN):
console.log(1 + 1)
console.log(2 - 2)
console.log(3 * 3)
console.log(4 / 4) // What does happen if you try to divide by 0? Try it!
Math expressions:
console.log(1 + 2 - 3 + (4 * 5) / 6)Power (MDN: Math.pow()):
console.log(Math.pow(5, 2))
// In modern browsers, you can also use:
console.log(5 ** 2)
Square root (MDN: Math.sqrt()):
console.log(Math.sqrt(25))Trigonometric functions, such as sin (MDN: Math.sin e Math.PI):
console.log(Math.sin(Math.PI / 2.0)) // Sin.
Comparisons:
Equality and sameness (MDN):
console.log(1 === 2) // Sameness: the three equals are required! console.log(1 !== 2) // Different.console.log("Franco" === "Franco") console.log("Franco" !== "Franco") console.log("Franco" !== "Your Name") // JavaScript differs lower case characters from upper case ones (and vice-versa). console.log("F" === "f") console.log("F" !== "f") console.log("Franco" === "franco") console.log("Franco" !== "franco")Other comparisons (MDN):
console.log(1 < 2) // Less than.
console.log(1 > 2) // Greater than.
console.log(1 <= 2) // Less or equal than.
console.log(1 >= 2) // Greater or equal than.
Variables and attribution (MDN):
Variables are like boxes that store values put inside them. The assignment operator (a single equal sign (
=) in JavaScript) commits the storage.let x = 123 console.log(x)let result = 123.456 + 987.654 console.log(result)You should note that you can declare a variable with a chosen name only once. However, you can change its value as many times as you need.
let name = "Franco"
console.log(name)
name = "Franco Garcia"
console.log(name)
let variables_can_vary = "Franco" console.log(variables_can_vary) variables_can_vary = "Your Name" console.log(variables_can_vary) variables_can_vary = "Another Name" console.log(variables_can_vary)let logical_value = true console.log(logical_value) logical_value = false console.log(logical_value) logical_value = (1 + 1 === 2)Constants (MDN):
const PI = 3.14159
console.log(PI)
const E = 2.71828 console.log(E) E = 0 // Error; the value of a constant cannot be changed once set.Errors:
console.log(Ooops!) // Text should be between double quotes, single quotes, or grave accents.
csl.log("Incorrect name for console")
console.log(1 / 0)
console.log(0 / 0)
Strings for words and text (MDN):
console.log("Ok, this is a valid string") console.log('Ok, this is another valid string') console.log(`Ok, this is also a valid string`)console.log("If you want to 'mix' `quotes`, you have to use those different from the external ones.") console.log("Otherwise, you will need to escape them with a backslash, like this: \". The backslash is required.")Logical operators (MDN):
console.log(true && true) // This is a logical "and".
console.log(true || false) // This is a logical "or".
console.log(!true) // This is a logical "not".
Conditions (MDN):
let browser = "Firefox"
if (browser === "Firefox") {
 console.log("Mozilla Firefox.")
}
let my_browser = "Your Browser" if (my_browser === "Firefox") { console.log("You use a browser by Mozilla.") } else { console.log("You use another browser.") }let i_use = "X" i_use = i_use.toLowerCase() if (i_use === "firefox") { console.log("You use a browser by Mozilla.") } else if ((i_use === "chrome") || (i_use === "chromium")) { console.log("You use a browser by Google.") } else if (i_use === "edge") { console.log("You use a browser by Microsoft.") } else if (i_use === "safari") { console.log("You use a browser by Apple.") } else if (i_use === "internet explorer") { console.log("You should use a more modern browser...") } else { console.log("You use another browser.") }Loops (MDN):
for (let i = 0; i < 5; i = i + 1) {
 console.log(i)
}
let j = 0 while (j < 5) { console.log(j) ++j // The same as j = j + 1 and similar to j++ (there are slightly differences) }let k = 0 do { console.log(k) k++ } while (k < 5)Functions (MDN):
function my_function(x, y) {
 let result = x + y
 return result
}
// A function is a block of code that performs arbitrary processing as defined
// by the programmer.
// After the definition, you can execute the function whenever wanted, using
// a function call.
z = my_function(12, -34) // This is an example of a function call.
console.log(z)
console.log(my_function(1, 2)) // This is another example.
Data types (MDN):
let integer_number = 1
let another_integer_number = -1
let real_number = 1.23
let logic_value = true // or false; it only can be either true or false.
let string_for_text = "Text here. Line breaks use\nthat is, this will be at\n the third line."
Input (MDN: prompt(); parseInt()):
// Once there is a request for a value, type one then press `enter`.
let your_name = prompt("What is your name?")
// parseInt() converts a number in text format to a whole number.
let your_age = parseInt(prompt("How old are you?"))
console.log(your_name)
console.log(your_age)
// The + operator for strings is not a sum, but an operation called
// concatenation that combines the second string after the first.
console.log("Hello, " + your_name + "!")
// A grave accent (`) allows to add variables inside the text, after a dollar
// sign and curly braces.
console.log(`You are ${your_age} years old.`)
Congratulations! You Are Already Able to Write Any Program in JavaScript
Well done! Whether you believe or not, you already know everything about JavaScript syntax to write any program. You even know that you can search information about language using MDN. To do this, you can use the search feature in the page or search in your favourite search engine for "mdn name of the resource".
There is yet much to learn about the language, yet the previous examples are enough to write any program. It is not a joke, it is a fact. It is even possible to create complete computers with a single instruction (known as one-instruction set computer or OISC).
The point is understanding that knowing the syntax of a language is like knowing the words of a (human) language and the rules to build sentences. The knowledge of words and how to combine them into phrases does not necessarily imply possessing the required knowledge to write a scientific paper or a novel.
Analogously, programming is not the knowledge of syntax or rules of a language, but knowing how to solve problems using the language. It is more important to understand programming logic and developing computational thinking skills than to know the syntax of a language.
Thus, I reaffirm that programming languages are tools. If you master computational thinking, you will be able to program using any programming language. All you will need is to refer to the syntax of the programming language and search for the required commands and subroutines.
Each step in its time. After you learn the syntax of your first programming language, your goal becomes to learn and develop computational thinking skills. In other words, you should start learning how to think like a programmer to solve problems using a computer.
However, before continuing, it is useful to learn how to write source code files (scripts). After all, you probably will not want to type the very same code every time you wish to run it. Do not do what a machine can do for you.
First Source Code Files
JavaScript as your first language. HTML as the second one.
JavaScript is an imperative language. You command the interpreter to do what your program should perform.
HTML is a declarative markup language. You declare to the interpreter what you would like to appear in your program. To do this, you use tags to define elements that should appear in the page. To learn some tags, you may consult MDN.
In other words, programming in HTML is different from programming in JavaScript, as you may observe in the following HTML code block.
First you should create a text file with any name you wish, as long as it has a .html extension.
For instance, website.html.
The traditional name for the starting page of a website (or a directory of a website) is index.html.
Regardless of the name you choose, type or copy and paste the following code on your newly created file:
<!DOCTYPE html>
<html lang="en-US">

  <head>
    <meta charset="utf-8">
    <title>Page Title</title>
    <meta name="author" content="Franco Eusébio Garcia">
    <meta name="viewport" content="width=device-width, initial-scale=1">
  </head>

  <body>
    <header>
      <h1>My Program</h1>
    </header>

    <main>
      <div id="contents">
      </div>

      <!-- Comment. The name of the JavaScript file mustbe the same as defined below. -->
      <script src="./code.js"></script>
    </main>
  </body>

</html>
The structure of the HTML code is different from the one used in JavaScript. Put simply, you:
- Informed the type of file (
DOCTYPE html); - Declared a documented starting in
<htmland ending in</html>. Everything in between the tags are part of the document. - Declared a head (
<head>) with title, name of the author and instructions for how the browser should display your page; - Declared a body (
<body>) with the contents. The body has a header (<header>) with a first<h1>level title It also declares a region (<div>) calledcontents, which is empty. The final of the file includes a JavaScript file calledcode.js, which you will create next.
Now you should create a file called code.js (if the name is different, you will need to change the name in the previous HTML file accordingly) in the same directory that you have created the file with your website.
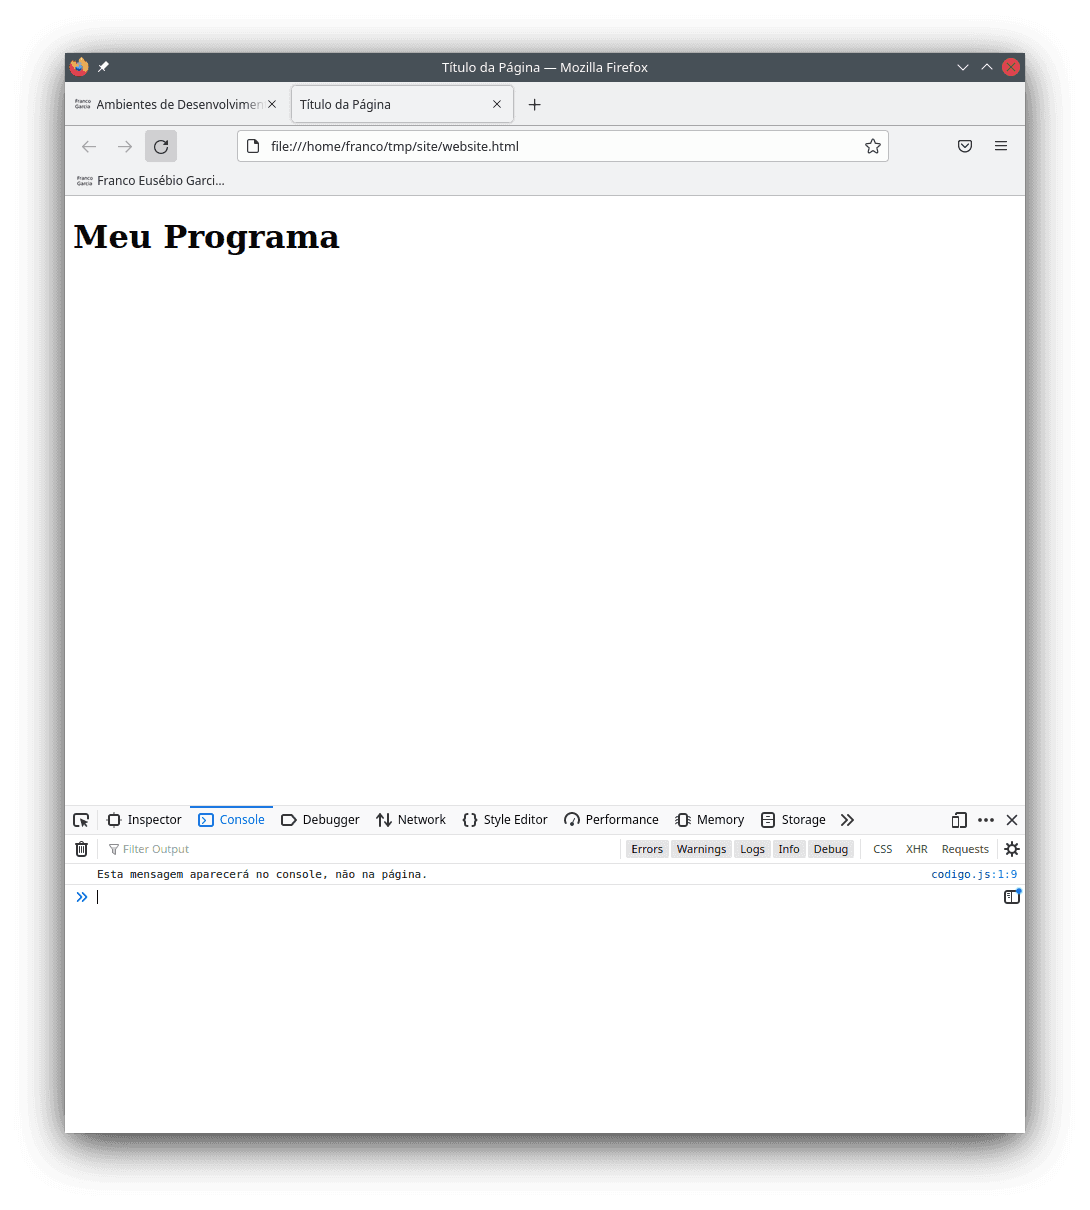
console.log("This message will appear on the console, not on the page.")Open the page in your Internet browser.
Next, open your browser's console (F12).
The text should be there.
From now on, you can create your programs and save them in a file to, later, run them in a browser.
Creating Content for Your Page With JavaScript
Although the previous solution should suffice, it is possible to do better. JavaScript can be combined with HTML to write directly on the page. To do this, we need to crate a new element and add it to the Document Object Model (DOM; to learn more, consult MDN).
The following code uses the following resources (namely functions, methods and properties):
document.getElementById()(MDN);document.createElement()(MDN);Element.innerHTML(MDN);Node.appendChild()(MDN).
function add_element(value, element_name = "p") {
    const parent = document.getElementById("contents")
    const new_element = document.createElement(element_name)
    new_element.innerHTML = value
    parent.appendChild(new_element)
}
The previous code block defines a function called add_element() that inserts a value into the created element.
At this time, you do not have to worry with the function definition, as it is more relevant to learn how to use it.
Though something to note is that the function's name uses a verb in the imperative (add).
Once again, you command your program to do something in imperative languages.
Thus, it is common to define function names with verbs in the imperative mode.
However, like variables and constants, you can define your functions using any valid names.
You could name the function xyz() if you wanted to; provided that you do not change the function's body (the code between curly braces), it will work the same way.
Naturally, it is better to choose a name that informs what the code does instead of choosing a random sequence of characters.
All you need to do to write text on your page using JavaScript is to use the add_element() function by providing a value.
For instance, after defining the function, you can write:
// Old code.
console.log("This message will appear on the console, not on the page.")

function add_element(value, element_name = "p") {
    const parent = document.getElementById("contents")
    const new_element = document.createElement(element_name)
    new_element.innerHTML = value
    parent.appendChild(new_element)
}

// New code.
add_element("Hello, my name is Franco. What is your name?")
Open your HTML page in a browser. What is shown in the console? What is shown in the page?
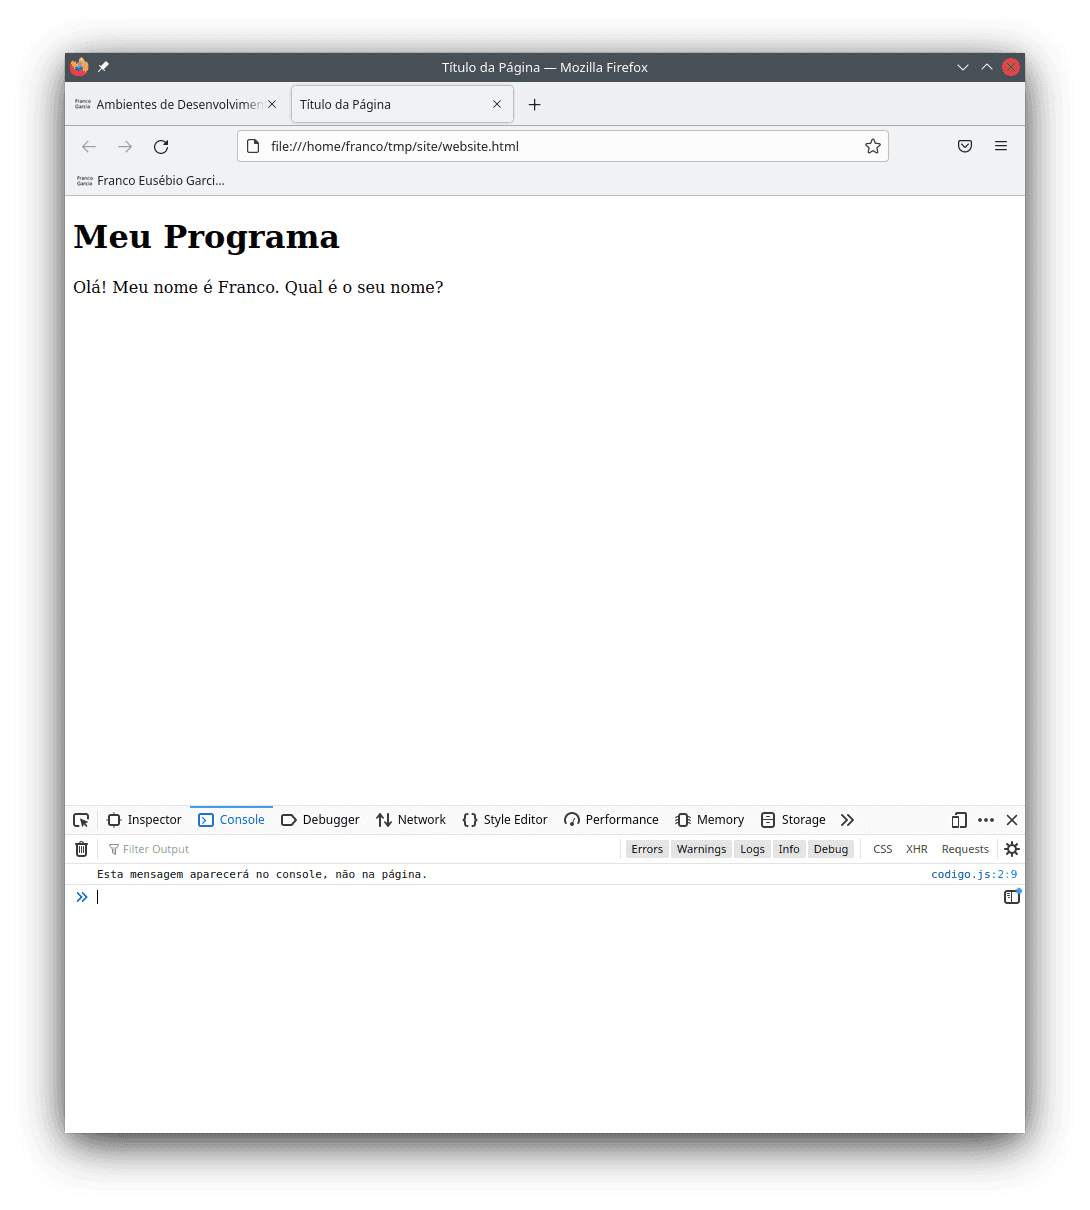
In the image, Olá! Meu nome é Franco. Qual é o seu nome? in Portuguese means Hello! My name is Franco. What is your name?.
Creating Other Elements
Every time that you change your JavaScript file and reload the page in the browser (for instance, using F5), the contents written using add_element() will appear as text in your browser.
Thus, add each new line from the next source code block a time. Save the JavaScript file, reload the HTML file in the browser, and check your results.
// Old code.
console.log("This message will appear on the console, not on the page.")

function add_element(value, element_name = "p") {
    const parent = document.getElementById("contents")
    const new_element = document.createElement(element_name)
    new_element.innerHTML = value
    parent.appendChild(new_element)
}

add_element("Hello, my name is Franco. What is your name?")

// New code.
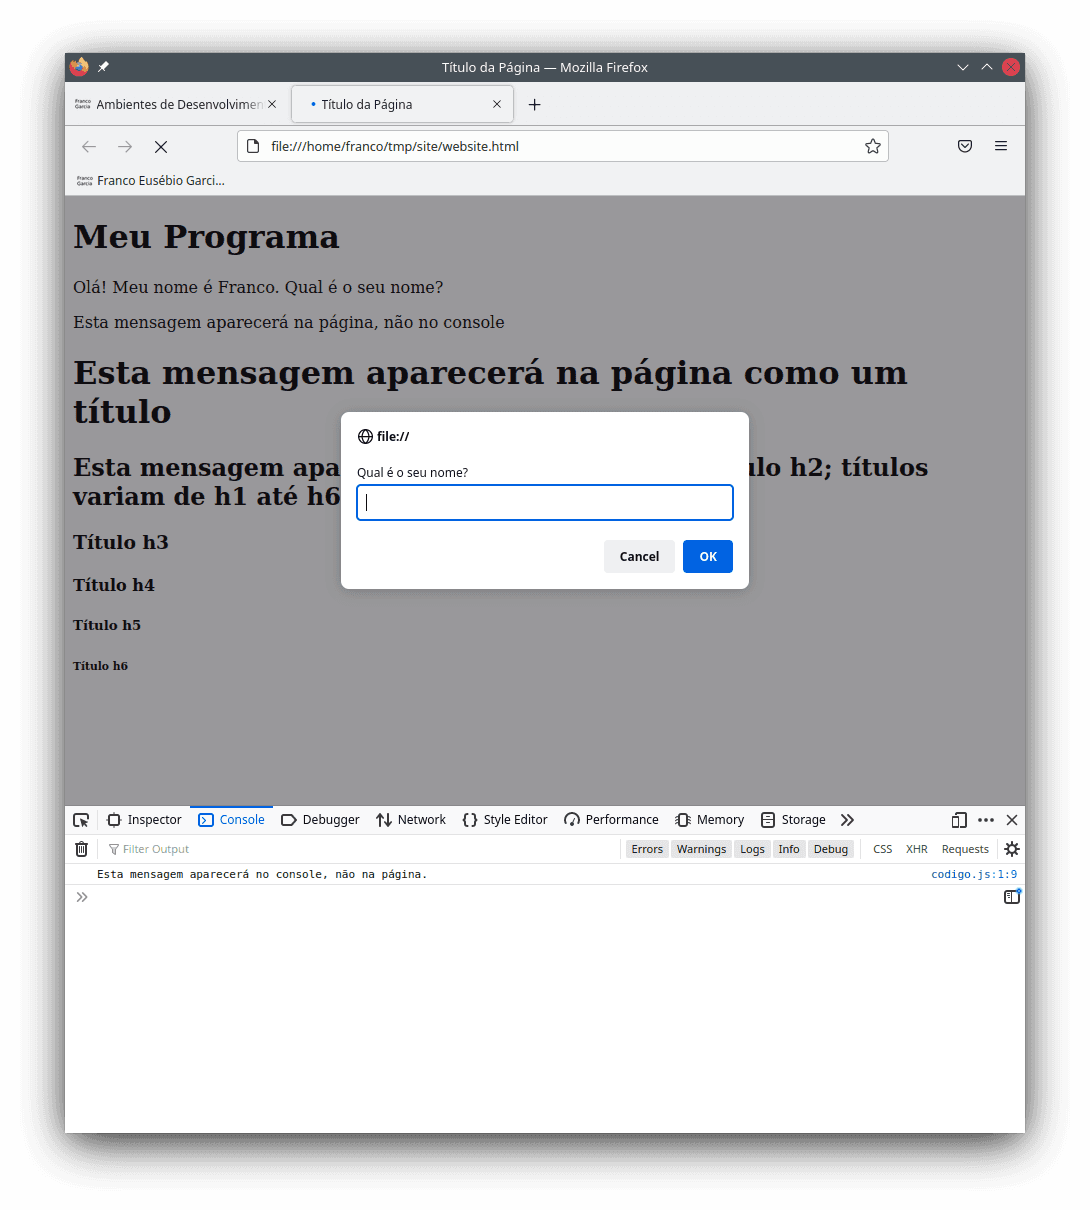
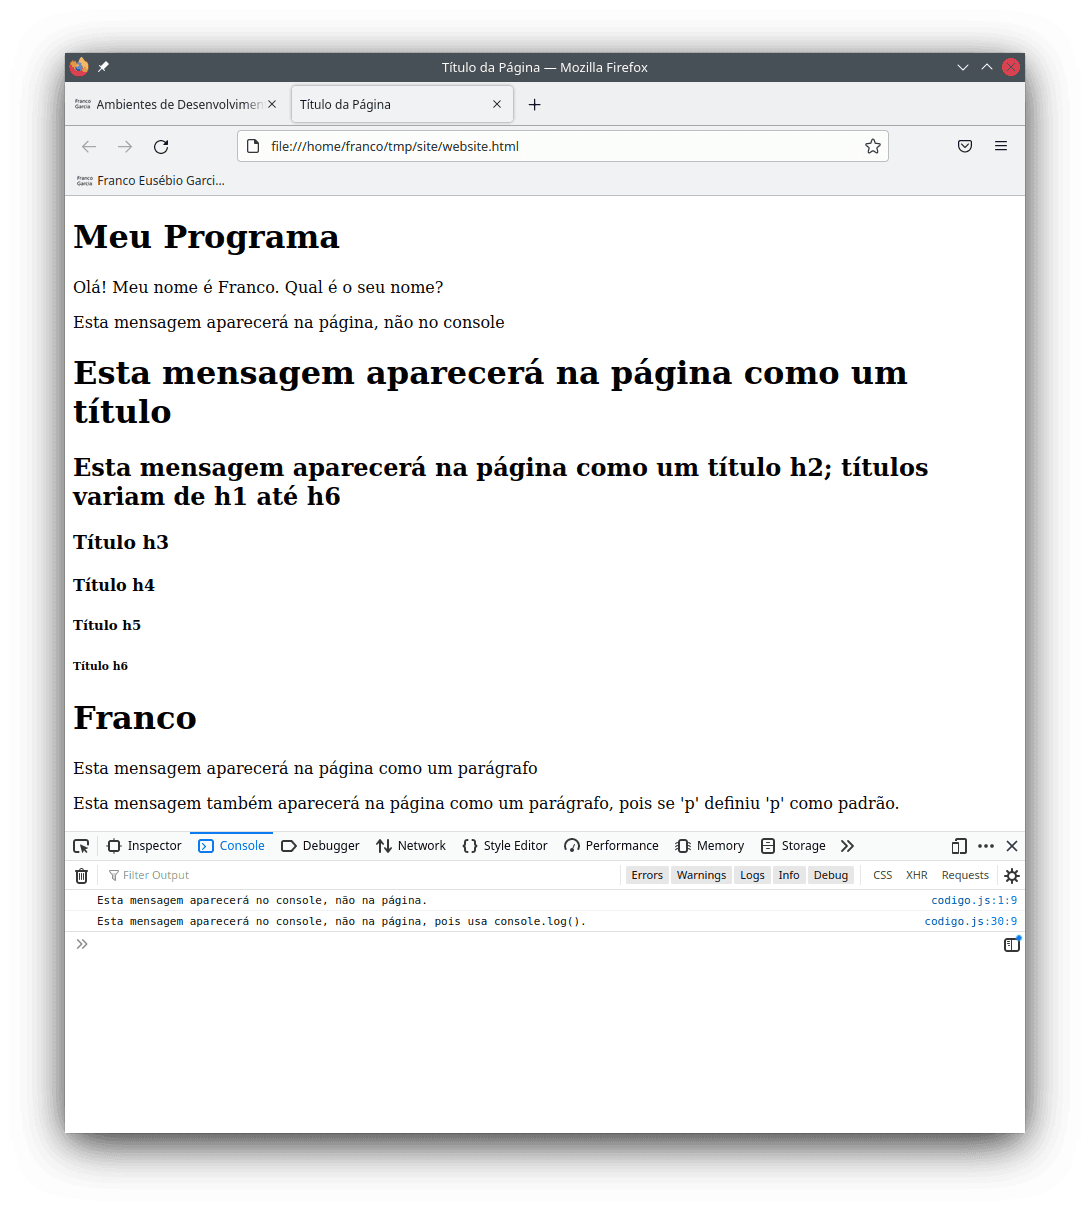
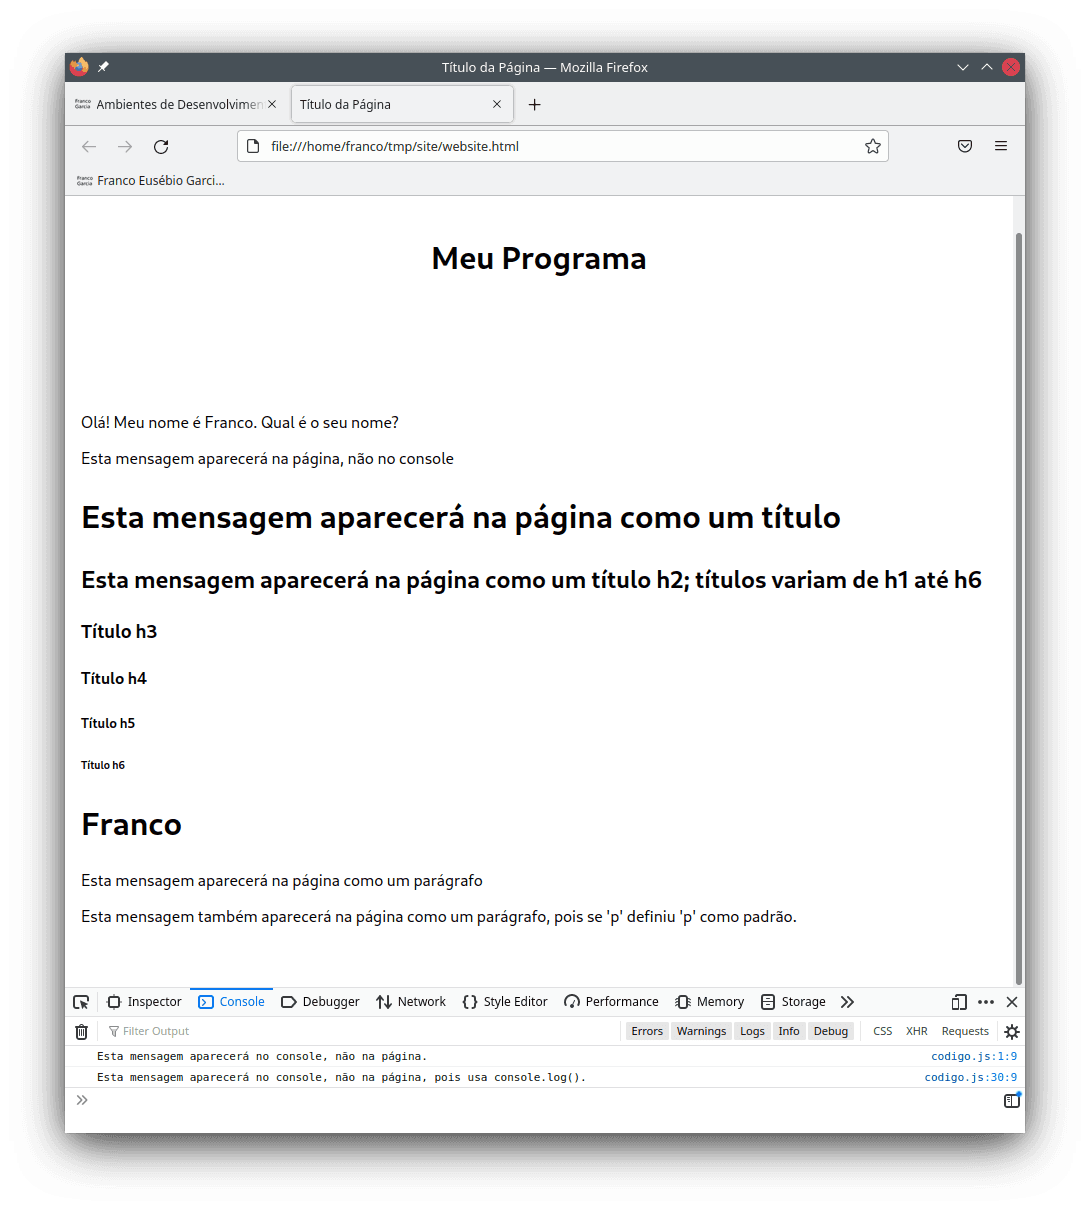
// You can use the function add_element() to write in your page using JavaScript.console.log("This message will appear on the console, not on the page.")// Titles can vary from h1 to h6.add_element("This message will appear on the page as a title", "h1")add_element("This message will appear on the page as a h2 title; titles vary from h1 to h6", "h2")add_element("h3 Title", "h3")add_element("h4 Title", "h4")add_element("h5 Title", "h5")add_element("h6 Title", "h6")// Example of input and how to store a read value in a variable.let name = prompt("What is your name?")add_element(name, "h1")// Example of writing a paragraph.add_element("This message will appear on the page as a paragraph", "p")add_element("This message will also appear on the page as a paragraph, as 'p' was defined as the standard value.")// The return to the traditional console.console.log("This message will appear on the console, not on the page, because it uses console.log().")
The results using the Portuguese version of the strings are displayed in the following images.
JavaScript and the Semicolon
There are programming languages that use a special symbol to mark the end of a line of code.
Many languages, including C, C++ and Java, use a semicolon (;) for this purpose.
In JavaScript, it is optional to end a line with a semicolon. In the past, it was required, though browsers also accepted code without the semicolon. At times, that resulted in wrong code.
Although such problem is rarer nowadays, it can still happen in some specific cases.
In general, problems can happen when a line starts with parenthesis (()), square brackets ([]) or curly braces ({}), because the interpreter may consider that it continues the last line.
Thus, there are people and style guides that recommend the to end lines of code with a semicolon.
If you want to avoid any problems, you can terminate all your lines of code with a semicolon. This can even be the best alternative to avoid surprises when you are learning programming.
console.log("This message will appear on the console, not on the page.");

function add_element(value, element_name = "p") {
    const parent = document.getElementById("contents");
    const new_element = document.createElement(element_name);
    new_element.innerHTML = value;
    parent.appendChild(new_element);
}

add_element("Hello, my name is Franco. What is your name?");
// You can use the function add_element() to write on your page using JavaScript.
console.log("This message will appear on the console, not on the page.");
// Titles can vary from h1 to h6.
add_element("This message will appear on the page as a title", "h1");
add_element("This message will appear on the page as a h2 title; titles vary from h1 to h6", "h2");
add_element("h3 Title", "h3");
add_element("h4 Title", "h4");
add_element("h5 Title", "h5");
add_element("h6 Title", "h6");
// Example of input and how to store a read value in a variable.
let name = prompt("What is your name?");
add_element(name, "h1");
// Example of writing a paragraph.
add_element("This message will appear on the page as a paragraph", "p");
add_element("This message will also appear on the page as a paragraph, as 'p' was defined as the standard value.");
// The return to the traditional console.
console.log("This message will appear on the console, not on the page, because it uses console.log().");
If you prefer, you can omit the semicolon at the end of each line. In general, the code will work correctly.
What is essential is to always test your code to guarantee that it is working as expected. With frequent testing, you will find problems as they happen, which can potentially help to fix their causes.
Furthermore, there is a tool called linter that can verify problems in your code and suggest correction (for instance, using ESLint or JavaScript Standard Style).
You Page With Style
The separation between content and presentation is a good programming practice. For Web programming, this can be easily achieved using CSS to style tags defined in HTML or created by JavaScript.
Thus, to improve the aesthetics of your page under construction, you can create a third file with the .css extension in the same folder of the .js and .html ones.
In this section, that file is named styles.css.
In the following CSS code block, you should note that body, header, main, h1, h2, h3, h4, h5, h6 and p are tags from the previously defined HTML file.
As always, you can refer to MDN to learn more.
body {
    background: #fdf6e3;
    color: #929e04;
    font-family: sans-serif;
    line-height: 1.5;
    margin: 0;
    overflow-x: hidden;
    padding: 0;
}

header,
main {
    margin: 0 auto;
    max-width: 600px;
    padding: 3rem 1rem;
}

h1,
h2,
h3,
h4,
h5,
h6 {
    color: #7491d2;
    text-align: center;
    line-height: var(--line-height);
}

p {
    margin: 0.75rem 0;
    padding: 0;
}
The chosen values for each parameter are arbitrary; they are based on some definitions of the Solarized theme.
You can modify them according to your preferences (especially colors and alignments).
Colors use HTML values, also known as colors in hexadecimal (hex) values.
You can search for "html color codes" or open any image editors (for instance, Paint on Windows; Gimp on any operating system; KDE also provides a tool to select a color displayed on your screen) to find hex values for colors.
Alternatively, Wikipedia has some entries listing cores in several colors systems:
- List of colors by shade;
- List of colors by name;
- Cores from A to F;
- Cores from G to M;
- Cores from N to Z.
To apply a style in a page, you need to modify the HTML code in the following way: inside the <head>, you should add the line <link rel="stylesheet" href="./styles.css">.
If your CSS file has another name, you need to change styles.css to your-file-name.css.
<!DOCTYPE html>
<html lang="en-US">

  <head>
    <meta charset="utf-8">
    <title>Page Title</title>
    <meta name="author" content="Franco Eusébio Garcia">
    <meta name="viewport" content="width=device-width, initial-scale=1">
    <link rel="stylesheet" href="./styles.css">  </head>

  <body>
    <header>
      <h1>My Program</h1>
    </header>

    <main>
      <div id="contents">
      </div>

      <!-- Comment. The name of the JavaScript file mustbe the same as defined below. -->
      <script src="./code.js"></script>
    </main>
  </body>

</html>
After reloading the page in the browser, it will have a new appearance.
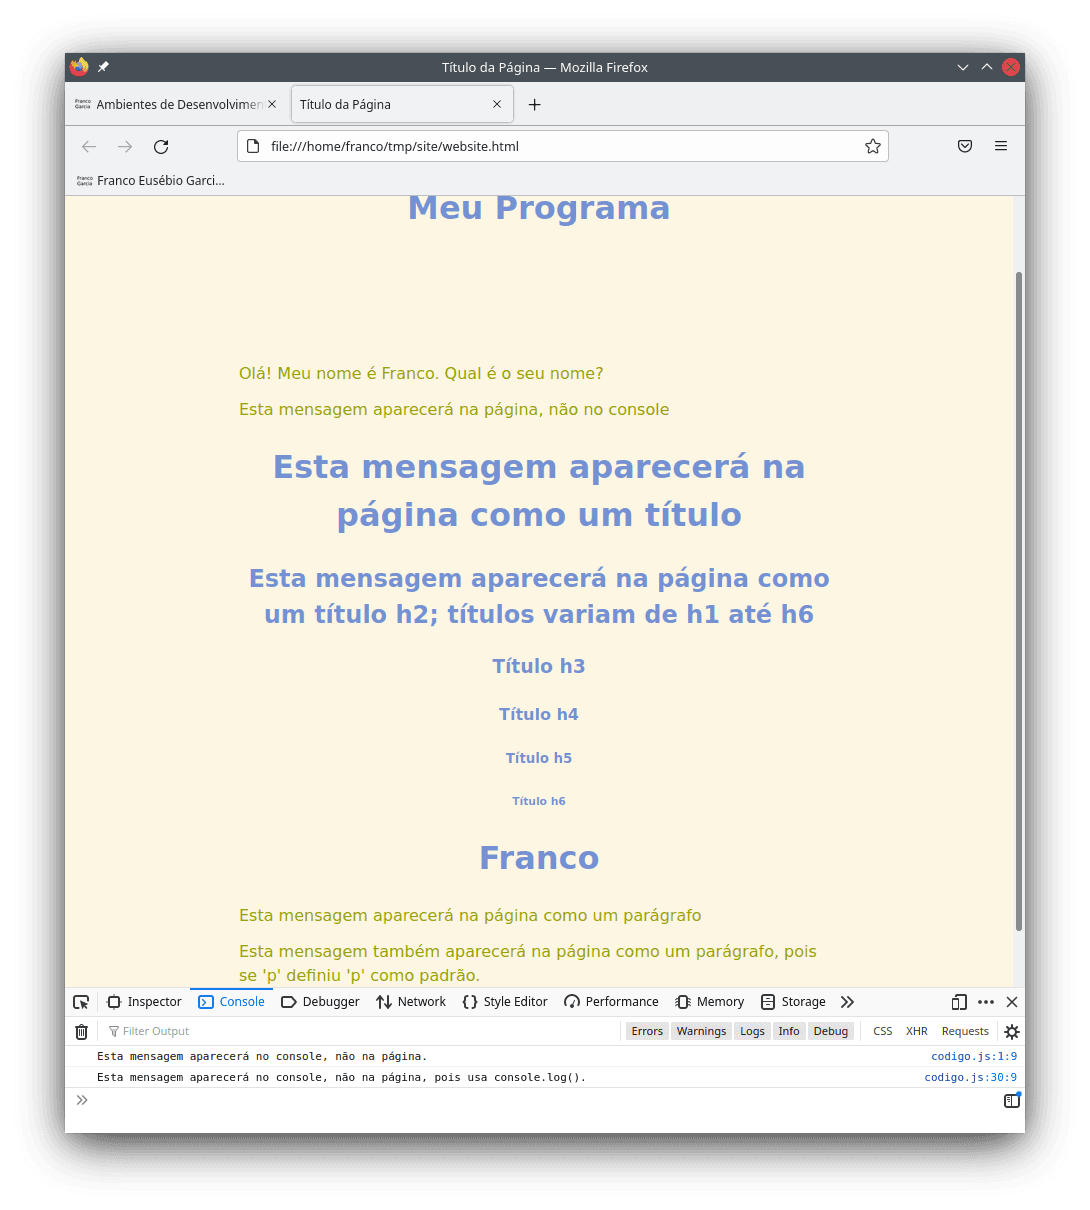
If you do not want to create a style, there are projects that provide predefined styles.
A simple-to-use option is called MVP.css.
To use MVP.css, the only required change is modifying the line with the style definition to <link rel="stylesheet" href="https://unpkg.com/mvp.css"> and reload the HTML file in the browser.
The illustration of the page using MVP.css is similar to the custom CSS file because the layout settings are similar (the CSS from the example is a simplification of t he MVP.css style with the addition of custom colors).
With completely different definitions, the appearance could change drastically without changes to HTML or JavaScript code.
For examples of how CSS can modify the appearance of a page, you can check the website CSS Zen Garden (for a theme list, refer to this link).
Other popular projects providing predefined styles include Bootstrap, Bulma, Tailwind and Materialize.
However, some projects can require further setup than MVP.css.
In general, you will need to make some slightly changes in your HTML files to use them.
JavaScript as a Single Language for Everything
In English-speaking countries, there is a famous phrase that says that "when all you have is a hammer, everything is a nail". Although this can seem absurd for the real world, there are people who use a single programming tool for everything. At the theoretical side, there is nothing wrong with this choice. Nevertheless, it is limiting and it also limits personal growth.
For those who wish to evolve as a professional, in my opinion, programming languages are tools. The knowledge from learning other languages and, particularly, other programming paradigms change the way to think in problems and solutions using computers.
To limit oneself to a single programming language is like trying to dig with a hammer. Is it possible? Yes, it is, but it requires significant efforts and time. Why shouldn't you use a shovel instead?
I would recommend that you not impose limits to yourself. JavaScript is not always the best option, as well as there does not exist a programming language that is better than all others for all problems. You should not do something only because it is possible. It is valid for learning, though there are trade-offs that should be considered.
When you have a collection of tools, you can choose the best one for each problem. In software development, there are cases on which the simplest solution can be the best one. Elegance in programming commonly results from simplicity combined with good ideas and practices. For each problem, choose the programming language that suits your solution in the simplest way.
Next Steps
With a development environment configured for JavaScript, you can start learning programming. Before starting further topics on programming and computational thinking acquisition, the next entries show how to configure development environments for other languages.
Many other programming languages require further knowledge and to use external libraries to write programs with graphical user interfaces. Browsers make the same process much easier for JavaScript.
JavaScript is a good choice for beginners because if the programming language of the Internet. This very entry was an example of how a combination of JavaScript, HTML and CSS allow writing programs multimedia content fast, with few requirements. In fact, only a text editor and a browser are needed.
Web programming can be simpler if compared to programming for other platforms and devices. However, this not mean that Web programming is simple. Besides a text editor and a browser, you will need discipline, studies and patience to become a developer.
The path to learn programming is a journey; you have just finished your preparations and started your first steps. At this moment, you have experimented with JavaScript with ready to use source code. Soon you will create your own code to implement programs with JavaScript. You should keep the dedication and move forward.
The next entries describe development environments for other programming languages. Afterwards, the focus becomes basic concepts for learning programming.
